How To Conduct Usability Testing with Maze
Usability testing often requires laborious procedures that get some designers discouraged at the mere thought of conducting one. Nonetheless, it is arguably one of the most important tasks user experience designers perform. Without usability tests, the whole user-centered design strategy falls apart.
What if there were alternatives to the expensive moderated usability testing and at the same time, tools that can help designers collect just as much quality research data?
Well, there are several of them. In this tutorial, we will consider a popular one— Maze. You will learn how to conduct Maze usability testing to obtain insights for your design process. But before then, a little background.
What is usability testing?
Usability testing is the process of testing your designs by observing users' interactions with them. The goal of this activity is to obtain feedback that will fuel further iterations in the design process, i.e to aid the refinement of the product.
Usability tests occur after the designers have interpreted some of their concepts into meaningful designs. These tests can take place at different points of the design, for instance, designers can test early concepts using Lo-Fi prototypes, and later on, with Hi-FI prototypes that look just like the final product.
Types of usability testing
There are two kinds of tests designers perform:
- Moderated tests: the test facilitator has to be present in this kind of usability testing. These functions include putting users through tasks where necessary, and most importantly— physically observing how they interact with the product and putting down these observations.
- Unmoderated: as you might have guessed, moderated tests come with limitations, sometimes it might be necessary to conduct usability studies with a large audience from different demographics or locations. In such situations, physically observing users is an expensive approach. Unmoderated tests do not need the physical presence of a facilitator. You can conduct them via online tools.
What is Maze usability testing?
Maze is a platform that enables you to conduct an unmoderated usability test with ease. Impressively, the platform allows you to test users with just about any kind of usability task allowing you to obtain both qualitative and quantitative data.
Using Maze, UX designers do not need much involvement in the process, you simply set up the prototypes to test, invite users by sharing links or through the platform itself after setting up tasks for them to complete to collect useful data on your design — even heat maps showing their click patterns.
Such tools that help user experience designers automate processes can help boost their productivity.
Interesting right?
So let's jump right into it. In the next section, we will look at how to use Maze in six easy-to-follow steps.
How to conduct usability testing with Maze
Maze is a cloud-hosted platform, hence, there's no need for any installations and the like. To test your designs, follow the steps below:
Step 1: Create the prototypes in your favorite design software
Every usability test starts with prototypes. In the design thinking framework used by UX designers, the Test phase usually follows the UX prototyping phase, though it is not a linear framework. To conduct quality tests, you need prototypes that closely mimic the product.
Creating prototypes is as easy as connecting different designs representing screens/pages in your product to mimic the expected navigational flow of the product.
Nearly all design and prototyping tools make room for this, and they usually provide a shareable link to that prototype.
Step 2: create a new Maze project
To import your prototype to Maze, you need to get the link to your prototype, if you are doing this from Figma:
- Simply head over to the prototyping page and copy the link provided.
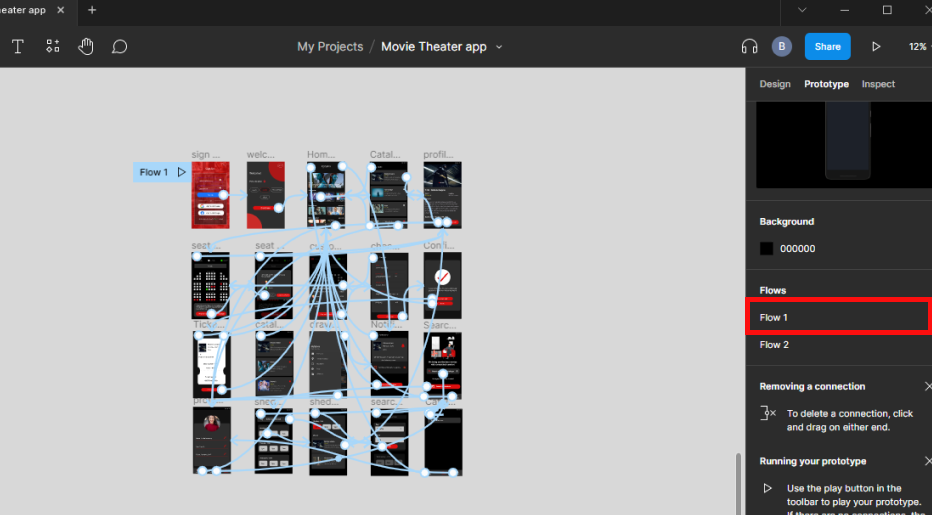
On clicking the flow, you will be able to copy the link to it.
- Head to the Maze software and open a new project

Note: instead of starting from scratch you can use one of the provided templates to perform your tasks.

These templates contain predefined questions and procedures that you might need to edit. But for the sake of this tutorial on how to use Maze, we just use a blank project.
Step 3: Create your Maze mission block
On clicking start from scratch, the page below opens. Here you are expected to add a block.
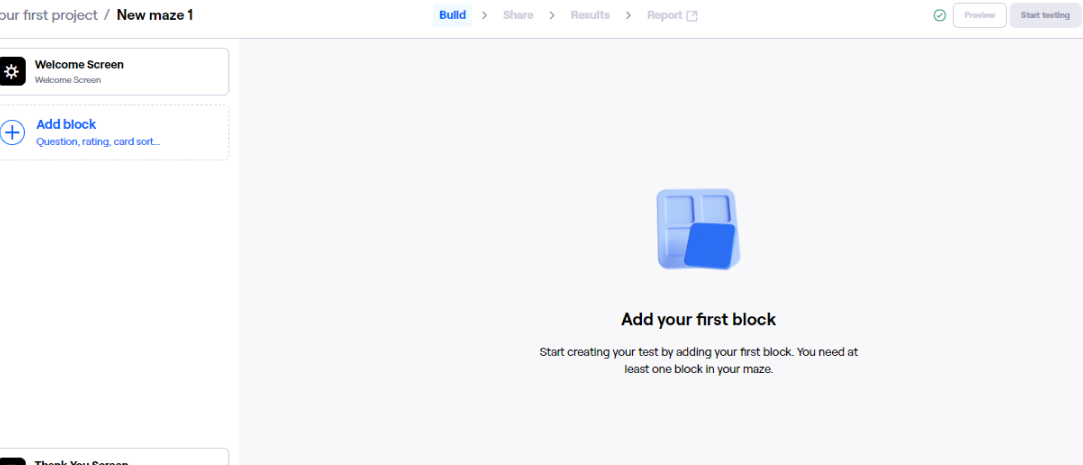
There are several tasks you can perform on the Maze platform, from usability testing to yes/no questions and opinion scales. All tasks are conducted in a "Maze"; this is what they represent a typical project as.
Each project contains Block types, which is just how Maze categorizes tasks you can conduct. There are two main kinds of Blocks - Missions and Question Blocks. For usability tests, you need to create a Mission Block.
- Simply select Mission from the list of Block types as shown below:
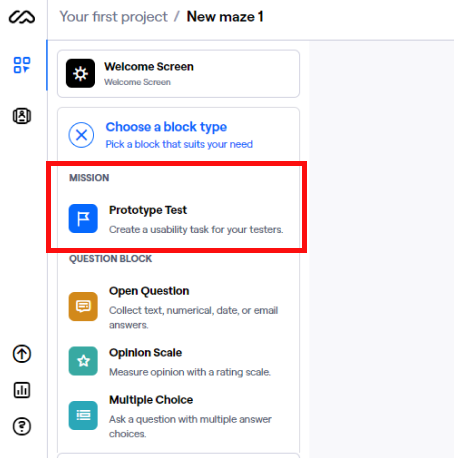
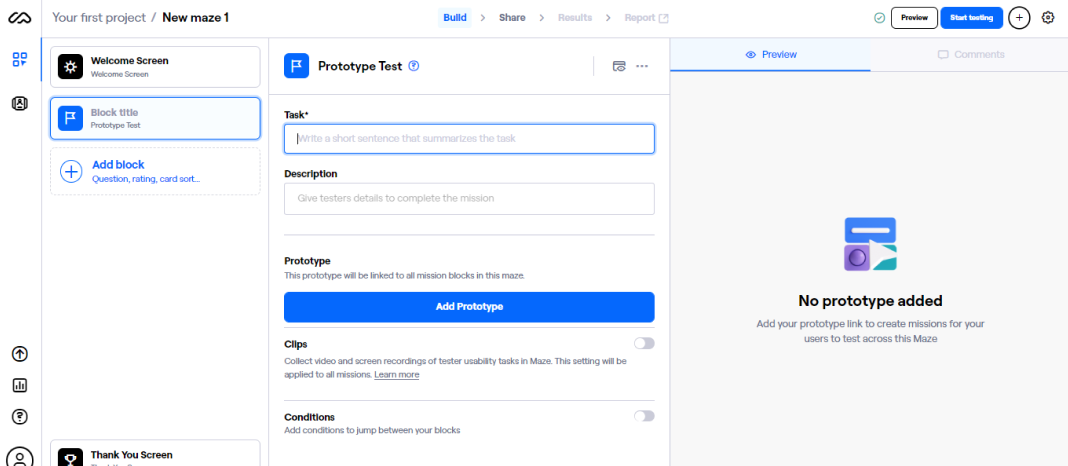
Next, you have to enter the details needed for the Maze test online. They include the task, description and prototype.
- The task is a brief heading describing the usability testing. It can be whatever you chose, but it's better to use one that relates to and finely captures the task users are to perform in your usability test.
- The description covers in more detail the user tasks. You can provide the instructions and other important information you want test participants to know in this space. It's recommended to clearly describe the activities of the task.
- The prototype is the group of pages that participants will interact with. You will import this from your design software. We will talk more about doing that in the next step.
Step 4: Import the prototype
Remember the link you got from step 2? Now is the time to use it.
- Click on the Add prototype button
- Enter the link in the space provided
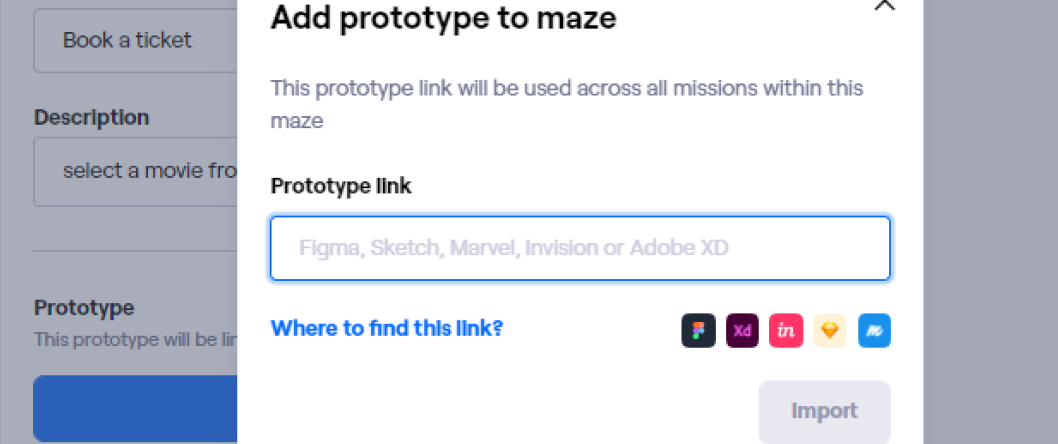
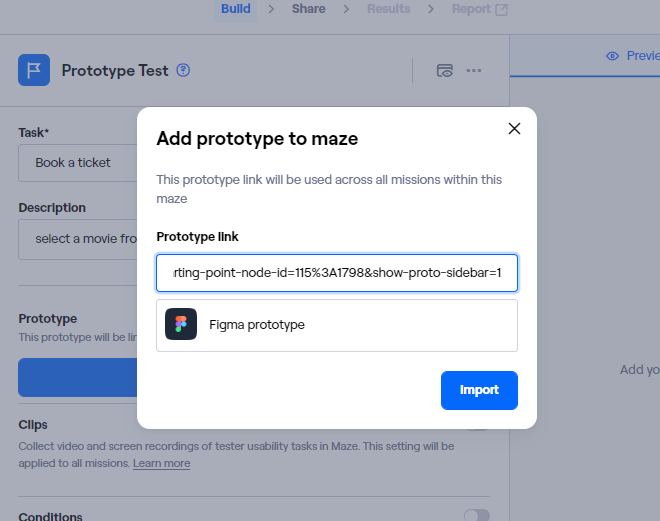
- Press Import.
Note: it's important to test a single flow at a time. Trying to test prototypes with multiple flows can result in the user following an unintended path and thereby failing to complete the given task.
Step 5: Set up the Maze mission
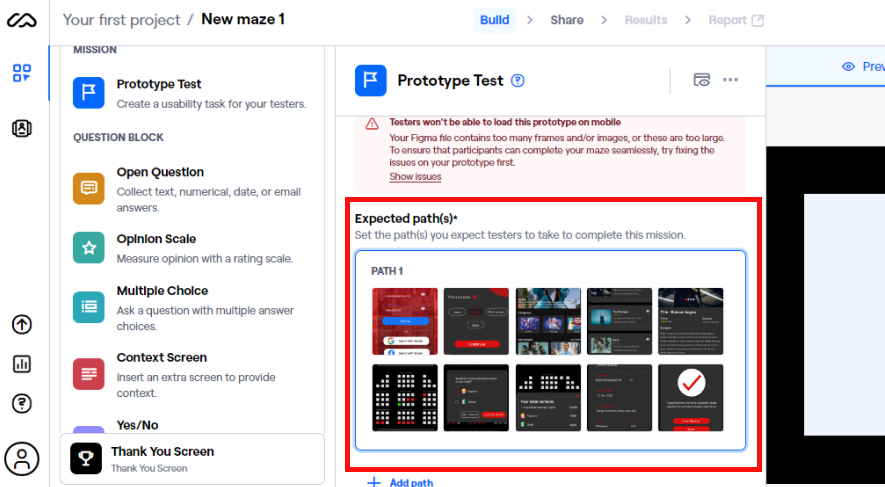
The goal of every usability test is to create tasks and collect data on how users perform them. Therefore, the next vital step is to create the Path. This refers to the expected routes users are to take to the finish point of the task.
Setting the path is as simple as clicking the various pages that link to one another in your navigational flow in the expected order.
- Scroll down to Expected paths
- In the preview section by the right, simply navigate through the prototype from the first page to the last. This loads up the expected user path.
Add the follow-up Questions
After completing a task, it's important to follow participants up with questions regarding their experience. Using the Open Questions block you can add open-ended questions to your mission in Maze.
To add questions, do the following:
- Click Open Questions under the Questions block on the left side of the Build page.
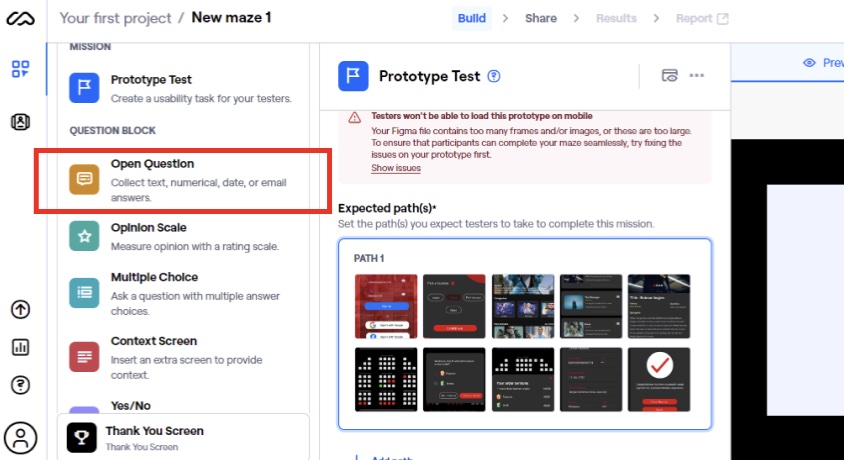
This will lead to the page below where you can enter a question:
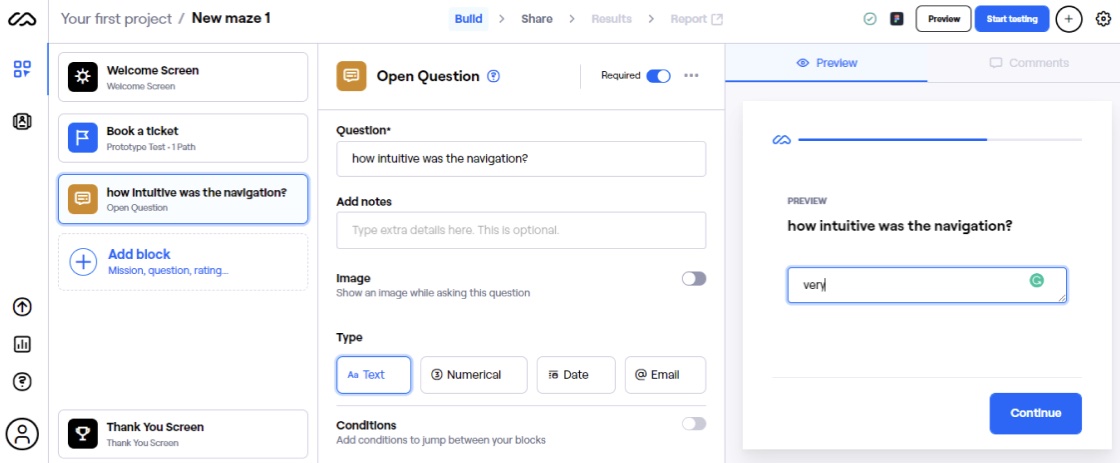
Now, when users complete your task, they will be asked whatever questions you entered.
Step 6: Take the usability test live
With all the necessary elements in place, you can now take your test live for participants to join!
- On pressing the Continue button on the Build page, the Share page below opens.
There are three major ways to invite participants: sharing a link, sending out a campaign via Email and hiring participants from the Maze platform.
- Select Copy Maze link
- You can send this link via any means of your choice to your audience.
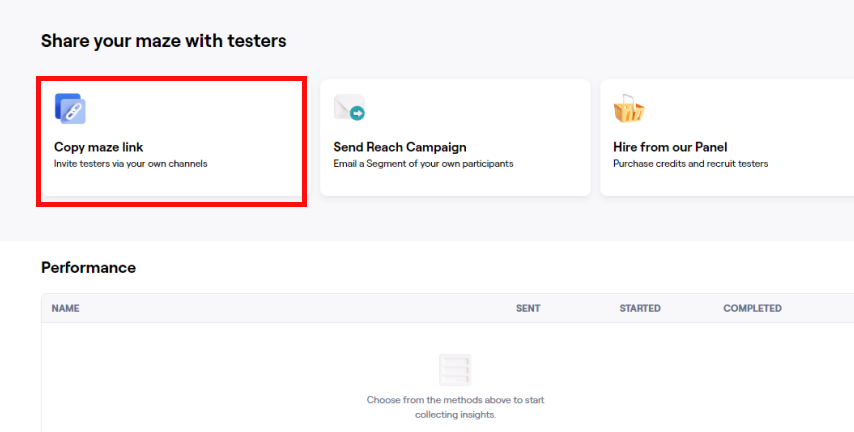
Edit a live Maze
Now, your Maze is live and participants are interacting with it in real-time. What if you realize all of a sudden that there are errors in your setup?
In our case, there are a lot of misspellings in our description. So is there something we can do about this?
Luckily, there is.
Maze allows you to edit a project even after taking it live. However, some aspects aren't safe to edit as doing that might affect your test outcome.
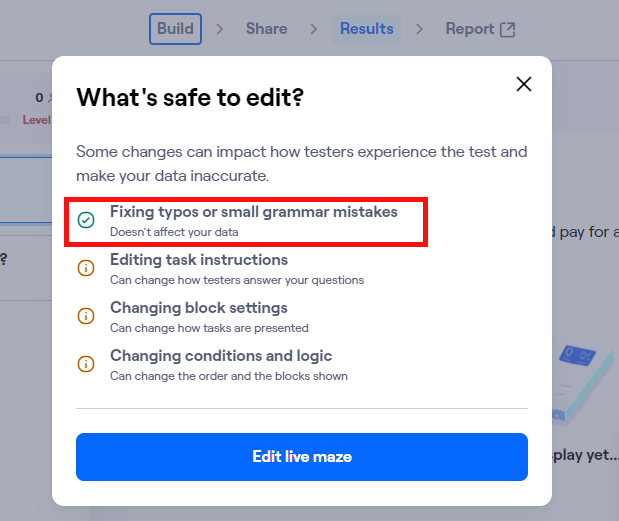
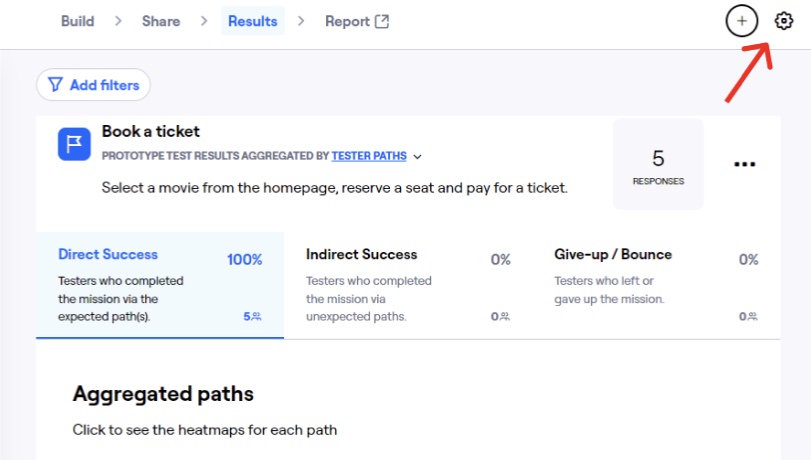
- Click on the Settings icon.
- Select the Edit Maze option.
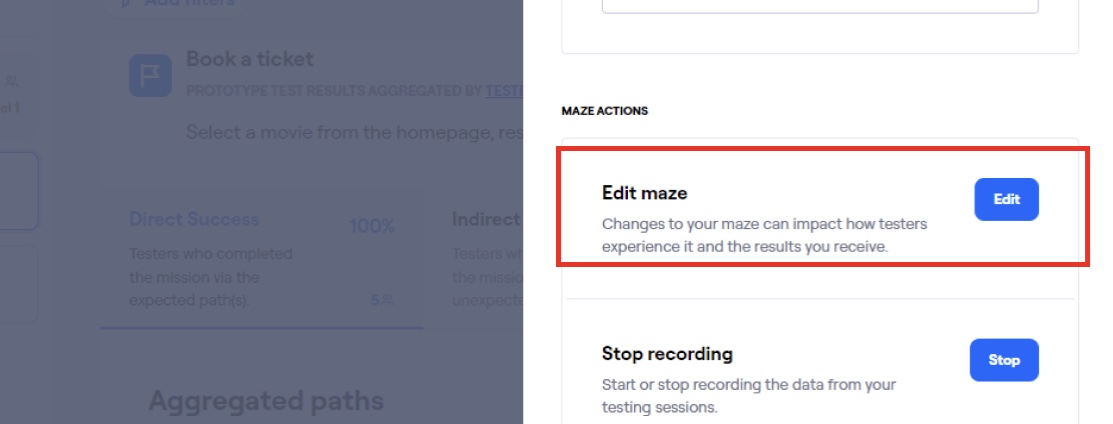
Now, you can change the details of your task.
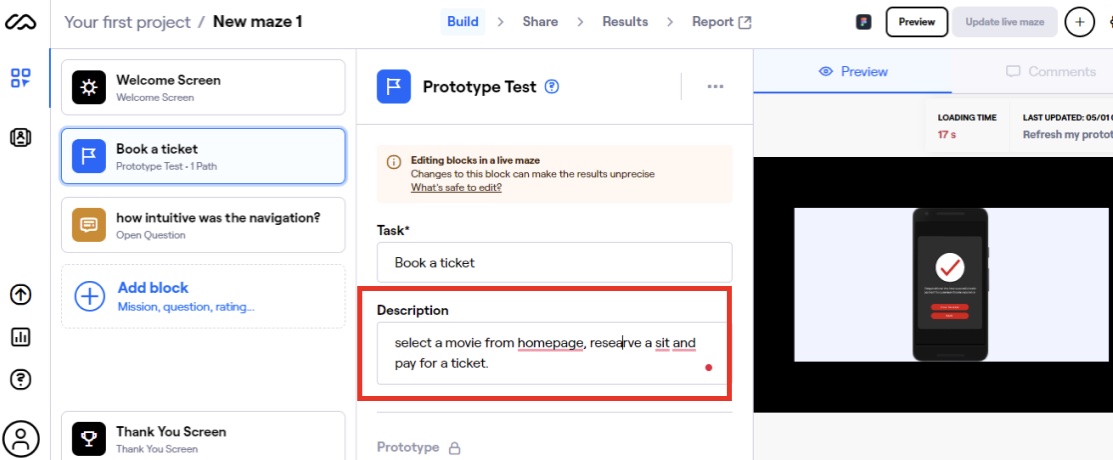
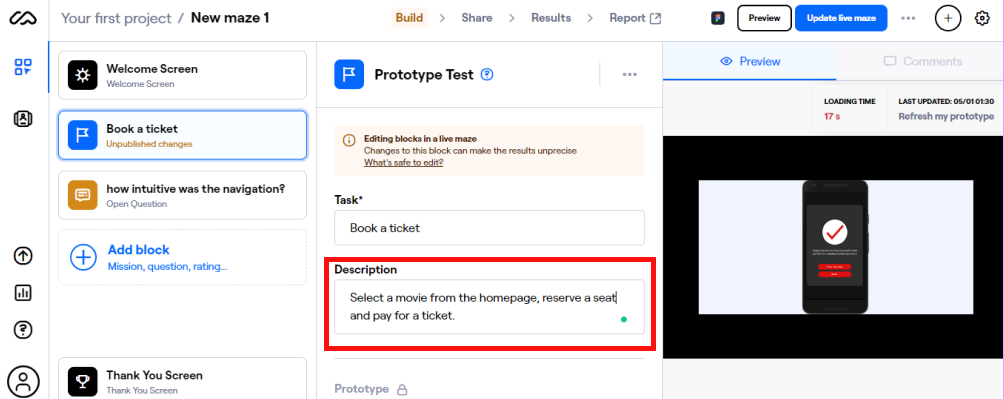
- After making your changes, select Update the Maze.
Analysing test data
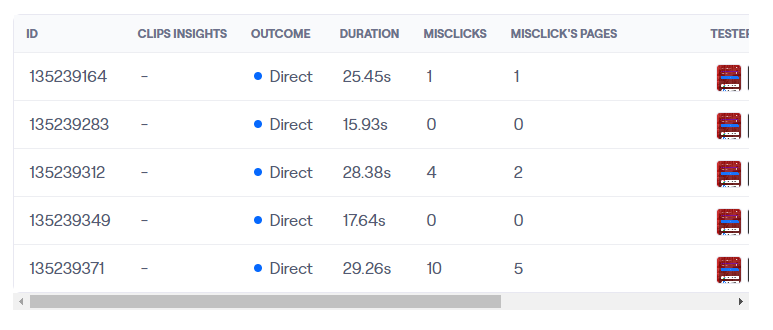
Maze delivers different kinds of data from usability tests. You can view the results of your test from the Results page. You will find information on Direct and Indirect Successes, the duration for completion of the test and others for each of the test participants. You can download this as a report as well.
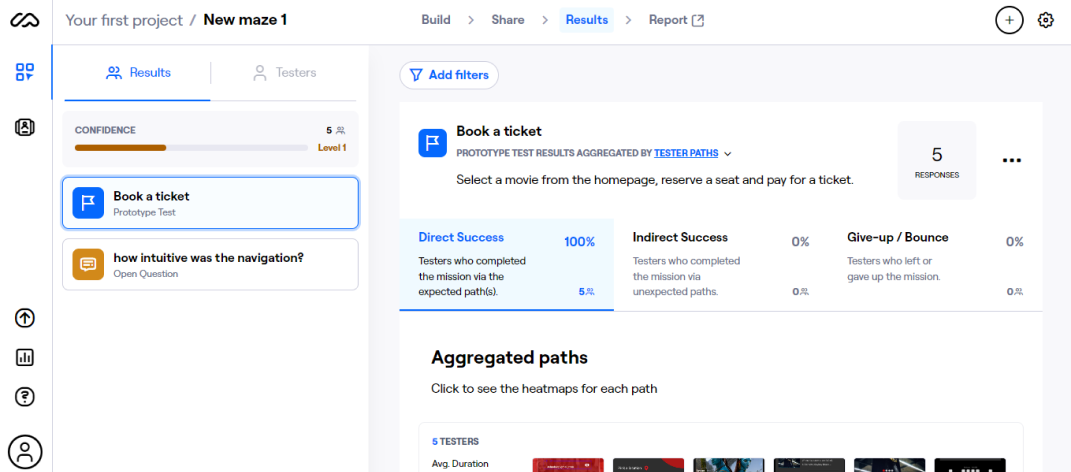
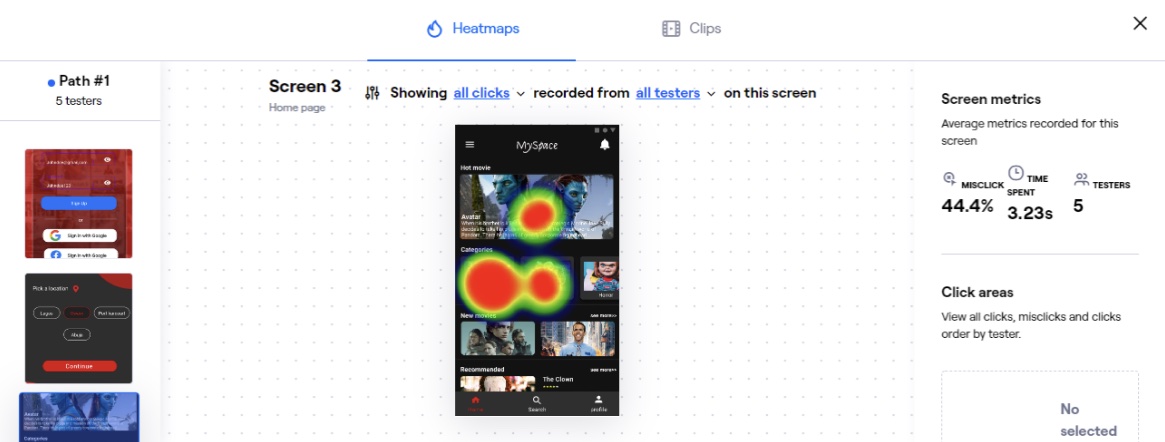
To view the heat maps for each page in your task:
- Click on the paths segment ➡ view heatmaps.
- Select a page.
Stopping the task
At some point, you might decide you have collected enough data for your usability test. The final step of the process is to end the live Maze.
To stop a usability study on Maze, follow the process:
- Go to settings ➡ stop recording

Why use Maze usability testing?
The benefits of testing your prototypes with Maze include:
Cost: recruiting participants for a usability test is often a hassle, more so, if you are after obtaining a large amount of data in which case you need probably thousands of users. The cost for such a study is even accelerated for moderated tests where you might need several facilitators. With usability testing tools like Maze, you can bypass many of these hurdles.
Speed and productivity: UX designers, whether full-time workers or freelancers, understand the place productivity has in the growth of their careers. Automating tasks such as UX research and usability testing helps them be more productive because they free up time to attend to other activities. Software tools such as Maze can help UX designers run and analyse usability studies faster without giving up on quality.
Freedom with questions: To ensure that the UX designer obtains quality data that truly represents the user's opinions and motivations, it is often necessary to employ a variety of question types. For more depth, designers use open-ended questions, opinion scales, etc, that enable users to freely express themselves. Maze enables you to ask users follow-up questions regarding the interface they interacted with— this can help you obtain more meaningful insights.
Quality data: you can analyse a variety of data thanks to the platform's support for multiple data types. One of them is heat-maps.
Heat maps show the click patterns on each interface in a visual format. The varying visual density can help identify parts of the screen with the most touches. This feature is important to UX designers as it can help them detect missed clicks that are probably due to poorly designed calls to action.
Help source participants: a Maze test online offers you the means to recruit participants as well, for a lot of designers, sourcing participants is usually a pain. With Maze, however, you can simply create your tasks and request for the platform to offer participants to partake in your test. However, this feature isn't free.
Live recordings: another interesting feature of the platform is the ability to record live user interactions in your studies. This can be valuable data to designers as it can help them gain a deeper understanding of user behaviour. Just like sourcing participants, this is a paid feature.
Conclusion
To be productive as a UX designer you need to consider alternatives to the more traditional approaches to UX design processes. Using software tools like Maze, designers can easily conduct usability analysis, obtain quality and diverse data, incorporate this into their design thinking strategies and create products that reflect an understanding of the user.


